Image Acquisition / Photo Technique
This section covers methods for acquiring digital images and some basic tools for image manipulation and correction.
General Photographic Technique
Lighting
Natural light is usually best for shooting human subjects and natural landscapes. When shooting outside, it's often best to keep the Sun and any bright surfaces behind the photographer and out of the image frame. If this is impossible, it may be necessary to adjust the camera's exposure or metering to avoid the camera overcompensating for the bright areas and making the subject too dark. The best times of day for shooting outside are usually early to mid morning, or mid to late afternoon. This is because the lower Sun makes shadows more defined, giving more depth to the view, and because the sky as a whole is contrasted, making the light softer with more "fill".
Focal length
The focal length of a lens determines the field of view (or how much of the scene) is captured in the image. At standard focal length is 50mm. A smaller number offers a wider angle of view, while a higher number offers a closer view. 28mm to 35mm is the the standard range for wide angle lenses, though specialty lenses offer views as wide as a full 180 degree hemisphere.
Depth of field
Depth of field describes how much a view is in focus. An image with an large depth-of-field has most of the image in focus. An image with a small depth-of-field usually has just the subject in focus, with the foreground and background out of focus. The decision on what depth of field is best for an image is based on the aesthetic principals desired for the shot, and on what the ultimate purpose of the image is. Depth-of field altered by change the camera's aperture setting: A large F-stop (F22, F3.5, etc.) means a smaller aperture opening, which means a larger depth-of-field (more of the image in focus). Note that the trade-off in using a large F-stop is that the smaller opening means that less light is coming into the camera, which may require the shutter to stay open longer. This could cause blurring, so a tripod may be a good idea if shooting for a large depth of field in a low light situation.
Previsualization
Previsualization refers to the idea of 'seeing' the final image while shooting a photograph. If a photo is intended to be used for a photosimulation, the photo must be shot with an idea of where the overplayed image of the new project will go. The image is composed with the final composite in mind so that once the photosim is complete, the new elements will be shown effectively.
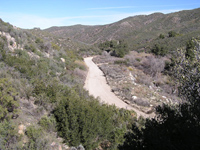
Existing Photo
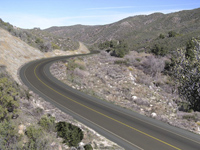
Visualize what the final image will look like
This process can be helped by using the 3D model to compose some views ahead of time in Microstation that show the new project effectively. Use the camera position from Microstation to help locate the view position in the field.
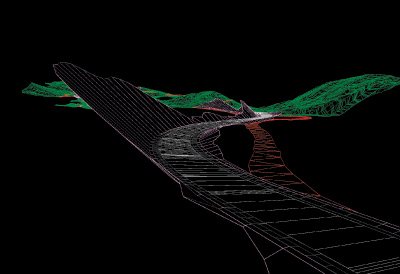
Model view
Digital Cameras
File types
Most digital cameras offer options for various formats on resolutions with which to save the photos taken. The best option depends on the ultimate use of the photo, and how much memory is available for saving the photos. Here are some rules of thumb:
JPG
Often, JPG format is the best option. It offers a small file size, so more pictures can be taken, and the quality is good enough for most needs. The main disadvantage is that JPG is a  lossy compression which discards some of the visual integrity of the image (though this is often not noticeable to the eye). If an image is to be edited, printed in a larger format, TIF or RAW may be better options.
RAW
RAW compression schemes are usually proprietary in nature, and vary between companies. RAW compression is generally lossless, and in some cases can retains addition image data such as exposure level, white balance, and more. However, RAW files are usually larger, and because RAW compression is proprietary, not all RAW images offer the same attributes. A RAW image from a Nikon Camera will be different (and may require different software for editing and viewing) than a RAW image from a Canon Camera.
TIF
TIF files are compressed with lossless compression, and the format is common enough that most imaging software can use them with no additional proprietary software support. The file size is often larger than a RAW file, and the image retains no additional information as RAW files do.
Shooting Film
Film speed
All rolls of film are assigned an ASA (American Standards Association) number, which defines the film's  speed , which is a term describing how quickly the film reacts to light. A higher ASA number means the film absorbs light more quickly, which means it is better in low-light situations. The trade off is that faster film also has a tendency to produce images which are more grainy and higher in contrast in appearance, so it is not advisable to use a high ASA film unless the lighting situation requires it. Kodak Max and Fuji X-Tra films offer good compromises at the 400 ASA level. They are both fairly fast, but still offer good image integrity. It is important the the camera be set for the ASA level of the film you are shooting, so that it can adjust image exposure accordingly.
Digitizing film
Even when film is used for photo acquisition, digitization of the image is often necessary for versitility in presentation  an image can't used for a powerpoint show or a website unless it's digital. The options for digitizing film include 1) scanning the film negative which offers better resolution, but usually higher priced hardware, and 2) scanning the film photo, which can be done with inexpensive equipment, but results in lower resolution. Another option is to use a photo lab which offers negative scanning as part of their development process. This offers the quality of negative scans with no need to invest in hardware.
Scanning
When scanning images, the same rules for image type and resolution would apply as discussed in previous sections. The file type and resolution should be determined by the final display and presentation method.
Color Control and Image Correction
Following are some of the more useful tools within Photoshop for correcting most problems with captured images. There is, of course, no substitute for good lighting in the original image, and for proper exposure by the camera. It is nearly impossible to improve upon a poor quality image.
Levels
The levels adjustment within Photoshop controls overall brightness of the image without adjusting the lightest and darkest areas of the image. It is the most useful tool for accommodating exposure or scan level problems. The tool is in the Image pulldown menus:
IMAGE>ADJUSTMENTS>LEVELS
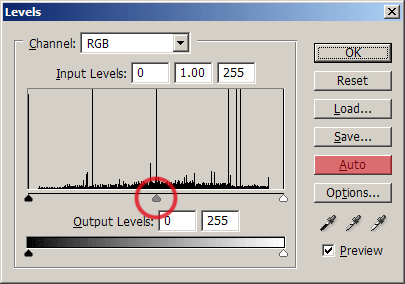
First try sliding the center Input Level adjustment (circled above) for minor corrections. The Auto button will set levels automatically (as will the Auto Levels command:
IMAGE>ADJUSTMENTS>AUTO LEVELS)
Auto Levels usually does a decent job, but for better control, test the Auto result, and then adjust manually
Brightness and Contrast
This tool changes brightness or contrast across the entire image, and is sometimes useful for quick, major image adjustment. The tool is also more useful for non-photo based images. The tool is accessed in the Image pulldown:
IMAGE>ADJUSTMENTS>BRIGHTNESS/CONTRAST
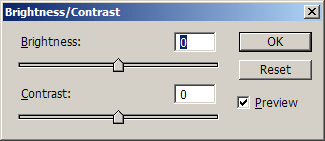
Just move the sliders left right and the result will be viewable on the image (if Preview is checked). A number can be input for either setting. This would allow similar settings to be applied to multiple images.
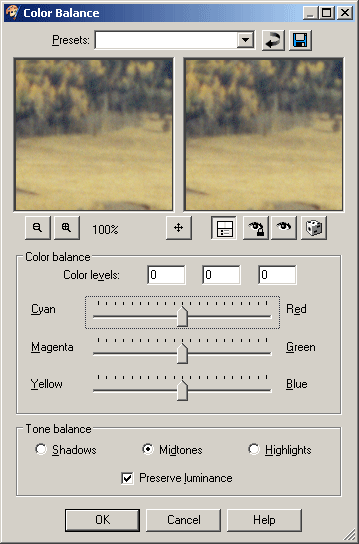
Color Balance
This tool is used to make minor adjustments to the overall color tint of the image. Scanned photos or slides sometimes take on a tint, or sometimes it is desirable to warm up or cool down an image. Color Balance is also under the Image menu:
IMAGE>ADJUSTMENTS>COLOR BALANCE
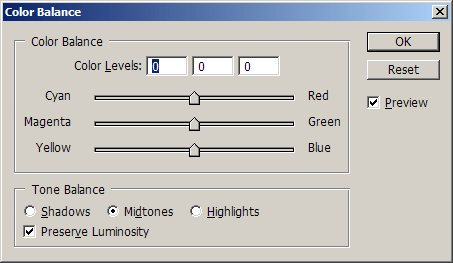
Move the sliders for the three channels left to right and the color changes will be visible in the image (as long as Preview is checked). The numbers in the Levels boxes can be used to repeat the effect on other images.
Color Control and Image Correction in Paint Shop Pro
In Paint Shop Pro, the Levels adjustment is found under
ADJUST>BRIGHTNESS AND CONTRAST>LEVELS...
The slider under Input Levels operates in the same way as in Photoshop. The window on the right shows a preview of the effect
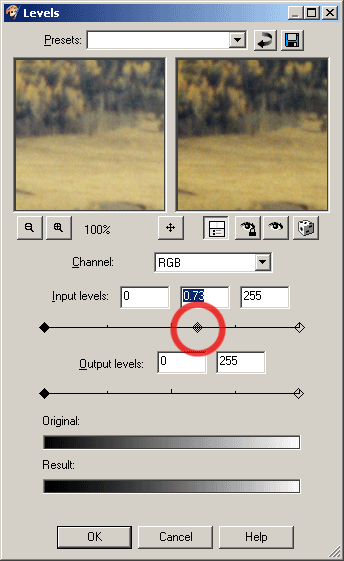
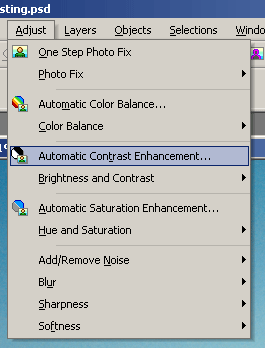
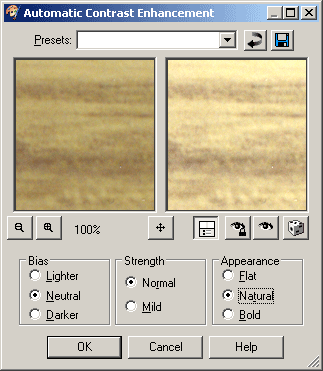
The closest equivalent to Auto Levels is the Automatic Contrast adjustment:
ADJUST>AUTOMATIC CONTRAST ENHANCEMENT...
This brings up a dialog with some basic options and a preview of the result in the right side window.
Brightness and Contrast
The controls for Brightness and Contrast are also under the Adjust pulldown menu:
ADJUST>BRIGHTNESS AND CONTRAST>BRIGHTNESS/CONTRAST.
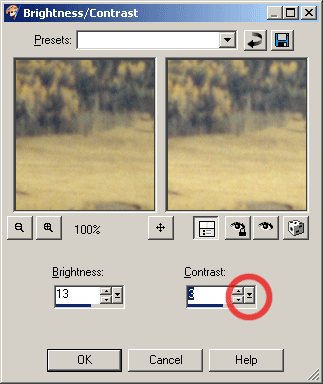
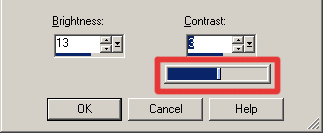
Small adjustments can be made by pressing the up and down arrows under either Brightness or Contrast; greater correction can be made by pressing the single down arrow over a line, which opens up a slider that is adjusted by moving the mouse left to right:
Color Balance
The Color Balance adjustment is the same as in Photoshop, and found under
ADJUST>COLOR BALANCE>COLOR BALANCE
